I’ve had Raspberry Pi SBCs sitting on shelves in my rack for years, plugged into USB hubs for power, and Ethernet for networking. The cable management challenge posed by all these cables only increases with each new Pi.
Upgrade Goals
Since the availability of the Raspberry Pi 5 stabilized in the first quarter of 2024, I was eager to upgrade a handful of older models with a set of 5s in a rackmount configuration. Instead of additional power supplies, my rackmount solution would use PoE from the switch in the same rack. I waited a little while hoping that the foundation’s own PoE hat would be available, but as of May 2024 it existed only in dreams.
The Pi 5 has a built-in real-time clock (RTC) for the first time. It is inconvenient for some of my use cases to have to wait for time synchronization, and I have relied on external RTCs in the past, so to have one finally on the board is great. To use it, however, you need to keep it powered and so an external battery is necessary to keep the clock ticking when power is removed from the Pi. Thus, another requirement for this project was attaching and configuring RTC batteries.
After careful consideration, the parts I used to complete the rackmount replacement were:
- Raspberry Pi 5 with 4 GiB of RAM (x5)
- Waveshare Power Over Ethernet HAT (F) (x5)
- UCTRONICS 1U Rackmount for Raspberry Pi
- UCTRONICS microSD Extender1 (x5)
- Lexar E-series 32 GB microSD card (x5)
- rechargeable RTC batteries (x5)
UCTRONICS make a variety of rackmounts for Raspberry Pi. The densest and least expensive 1U solution compatible with the Pi 5 is their U6264, which mounts not only five Pi 5 SBCs, but also has room for a 2.5″ SSD (or HDD, actually) in each module. The modules are attached to the rackmount with captive screws and allow each Pi to be inserted or removed from the front of the rack. Each module has a hole for an SD card extender (U6192, an additional purchase) that allows a microSD card to be inserted in the front of the module. Otherwise, you would have to remove the module to get at the microSD card slot in the Pi’s rear. Note that the microSD card extenders are sold in packs of four; I had to buy two packs.
Assembly
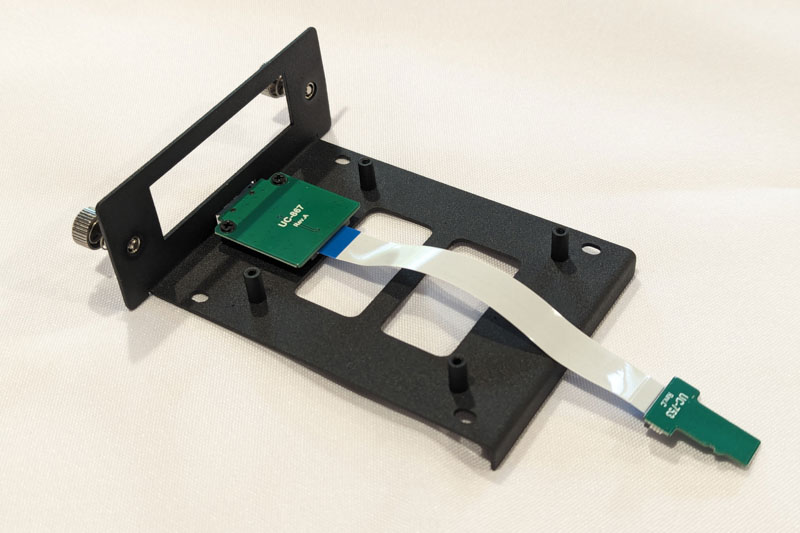
Once the SD card extender is mounted to the module, the SBC can be mounted to the module. But before screwing it down, I wanted to mount the heat sink provided by Waveshare with their PoE HAT. The image below shows the Pi 5 as it comes from the factory.
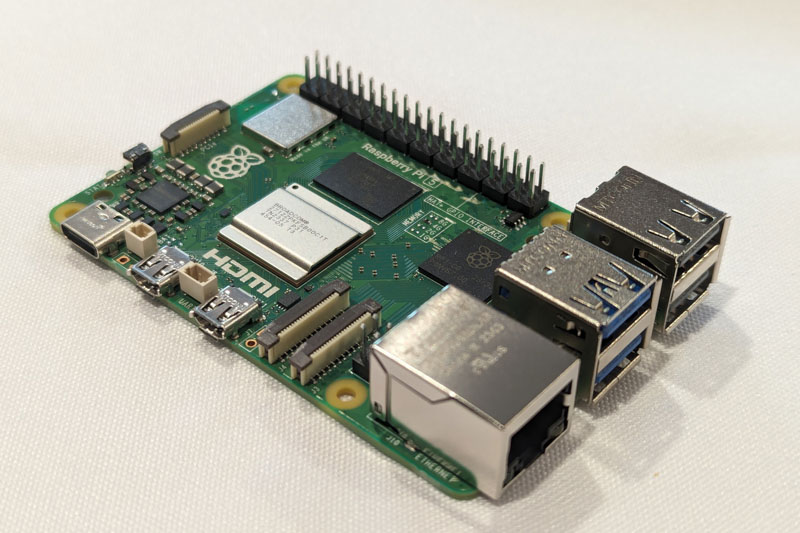
The provided heat sink only covers three components more-or-less completely: the Broadcom SoC, the DDR4 memory chip between the SoC and the GPIO, and the WiFi/Bluetooth module near the PCIe interface. I assume (since there’s no documentation for guidance) that all three of these are supposed to be covered by the thermal pads that Waveshare supplies, as shown in the next image.
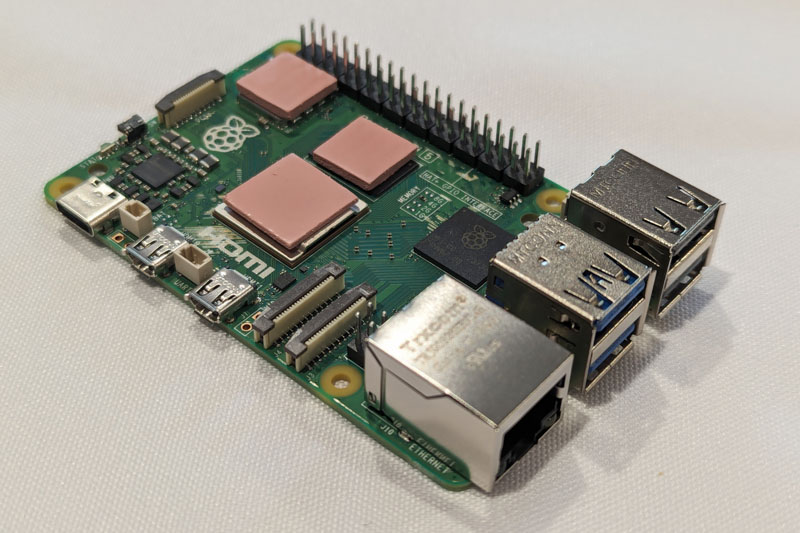
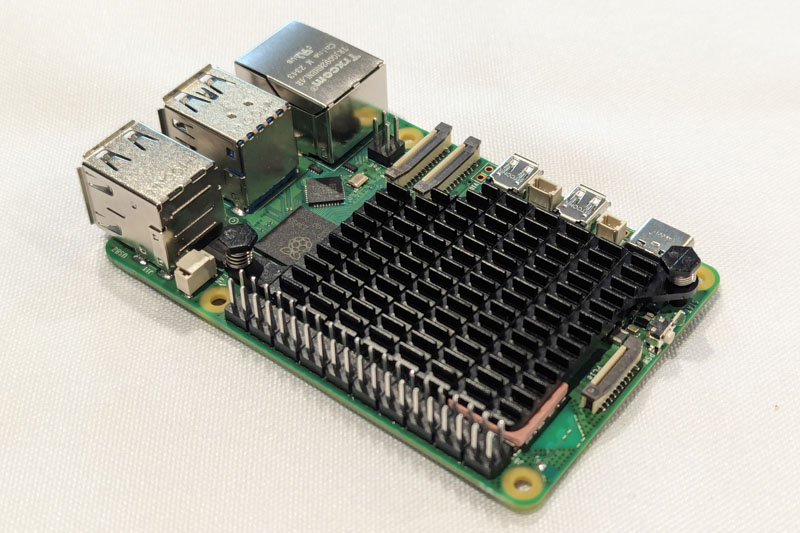
Maybe the power management chip should be covered instead of the Wifi chip. Does it heat up if the power comes from Ethernet? I’m not using WiFi or Bluetooth, so that component should not get hot, but a third pad offers stability for the heat sink. Two pins hold the heat sink in place, as in the next image.
Now before putting the PoE HAT on, I want to plug in the RTC battery. It is possible to do it with the HAT installed, but it’s tight, so doing it while the top is accessible is better.
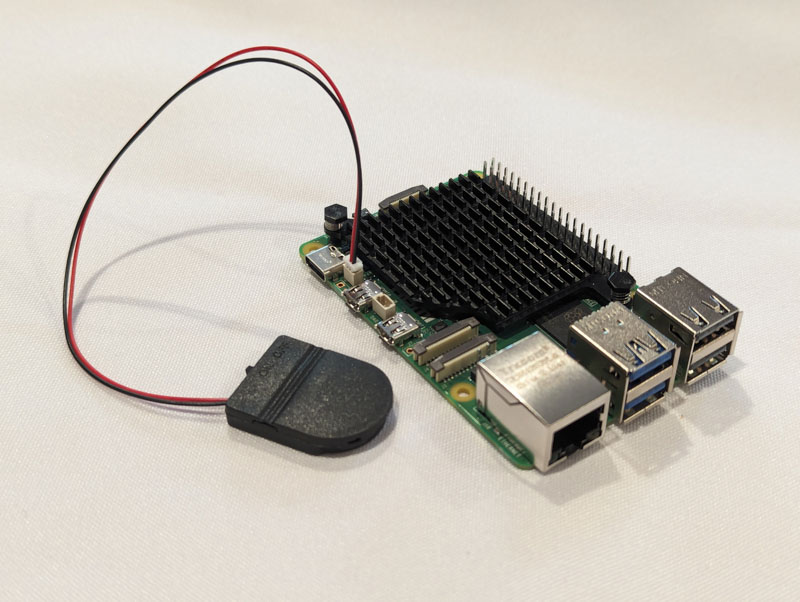
The battery I used is a secondary lithium metal cell, ML2032, at 3V. A change to the boot config will make the Pi trickle-charge the cell. You shouldn’t use primary cells, like the CR2032. You cannot charge them and they will discharge quickly on this SBC. I purchased the battery housing and cable assemblies from a supplier in China on eBay for just over $1 each.
Now the SBC can be mounted to the module. UCTRONICS provides the screws.
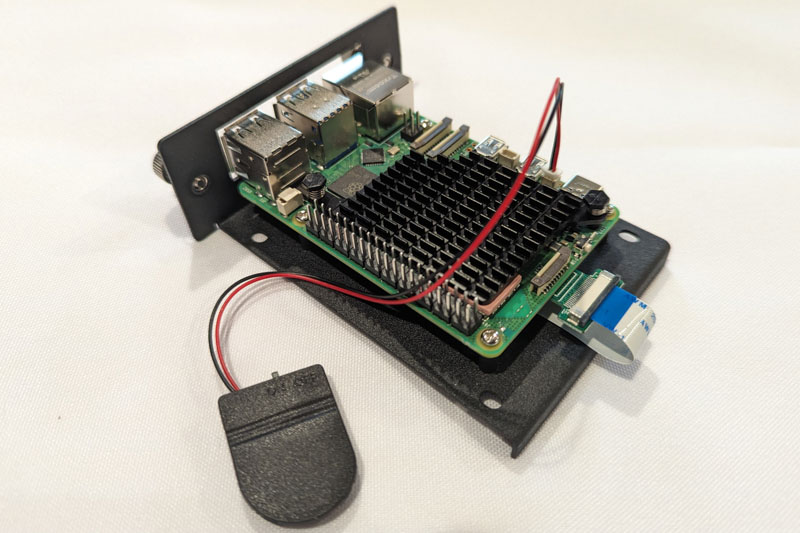
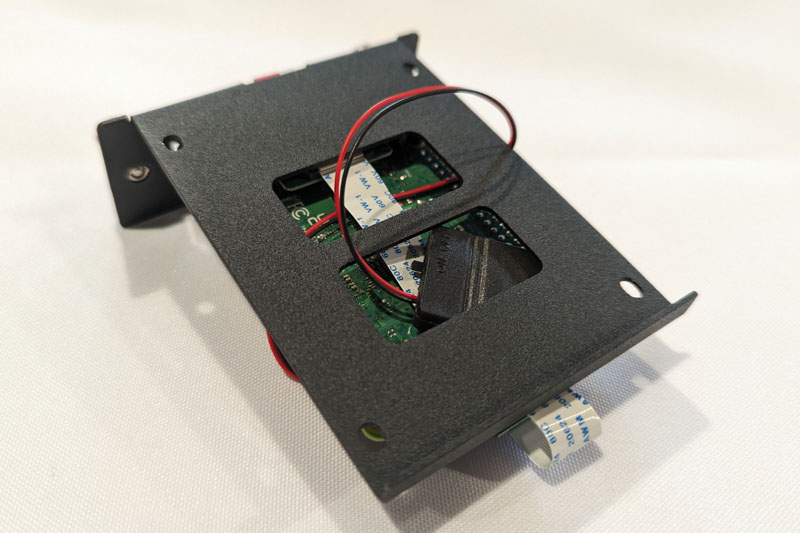
I tucked the battery case underneath the Pi, between the module and the microSD extension cable. Taping it to the bottom of the module or securing it with a small piece of velcro is also an option.
At this point, the PoE HAT can be mounted. Waveshare includes standoffs to mount the hat, but they are completely unnecessary unless vibration, compression, or (somehow) torsion, might affect the stability of the HAT. The HAT can be held in place by just the 40 GPIO pins and the four PoE pins quite securely. Since I would need different standoffs to mount the Pi to the module, I chose to mount the HAT without standoffs.
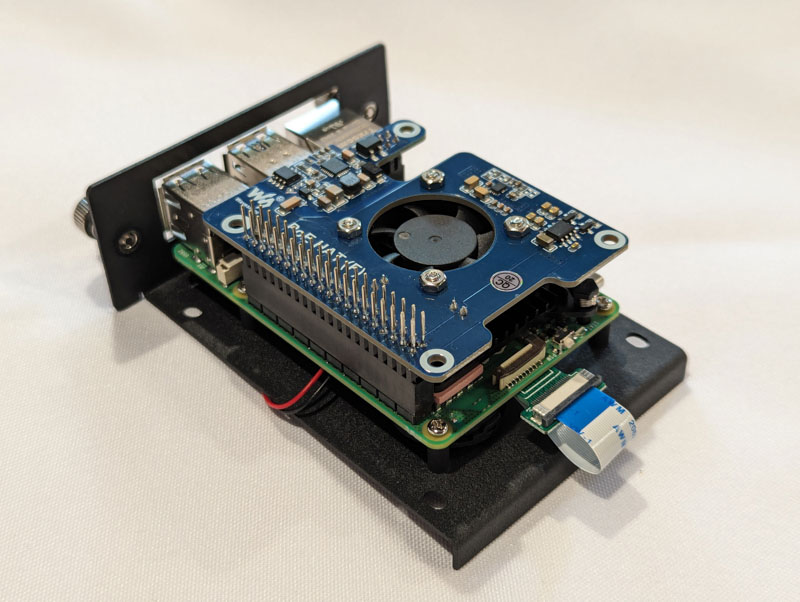
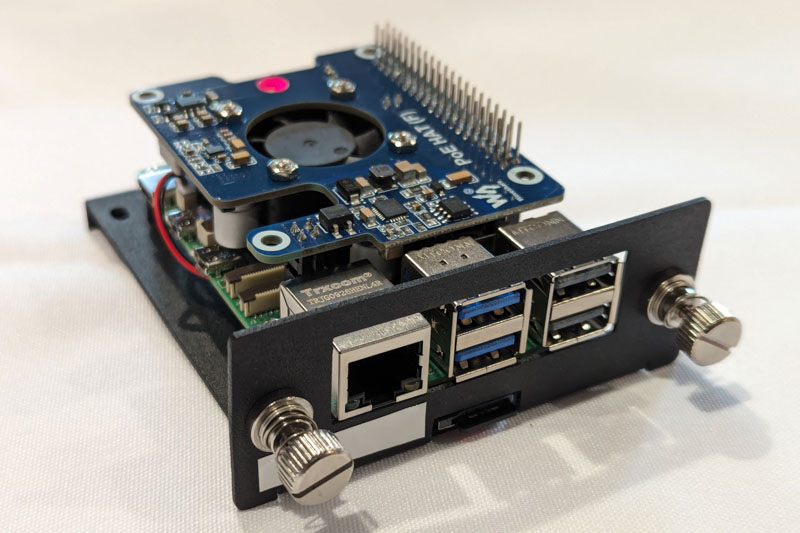
Once the PoE was on the Pi 5 while the Pi was mounted on the module, I noticed that the GPIO pins on the HAT extend a couple of millimeters above the top edge of the module face. I was concerned that this might make insertion of the module difficult, but it wasn’t. However, when secured to the rackmount the GPIO pins touch the component above in the rack; in my case, a switch. I noticed this when the Pi failed to start up normally after inserting the network cable: the LED on the Pi turned red because the pins were shorted by contact with the bare metal of switch case.
I was tempted to just cut the GPIO pins off the HAT, but sanity prevailed and I printed a cover for the pins which insulates them. I used Zan Hecht’s model and there are many other free models to choose from. Below is an image of the complete module with insulated GPIO pins.
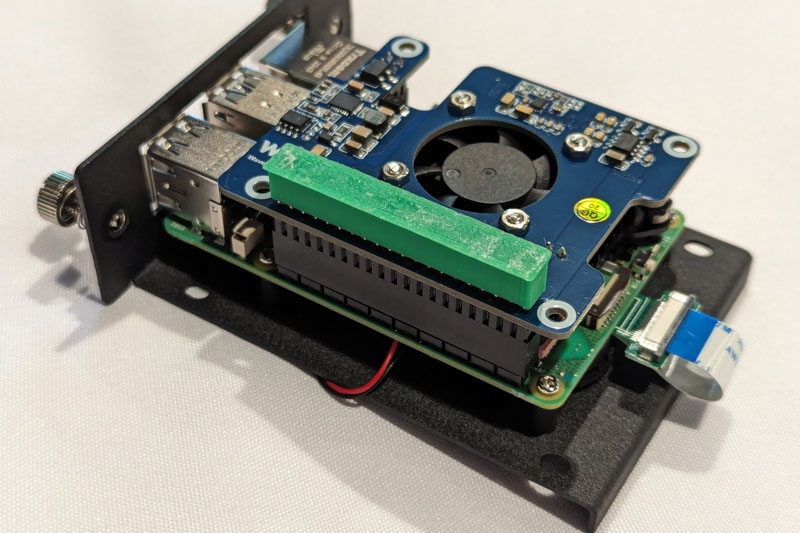
Once the module is assembled, it can be inserted into the rackmount and secured using the captive screws. Tightening the screws the first time may be tough because there is often paint in the threads. Make sure you are driving the screw straight if it offers resistance. The second time will be smoother.
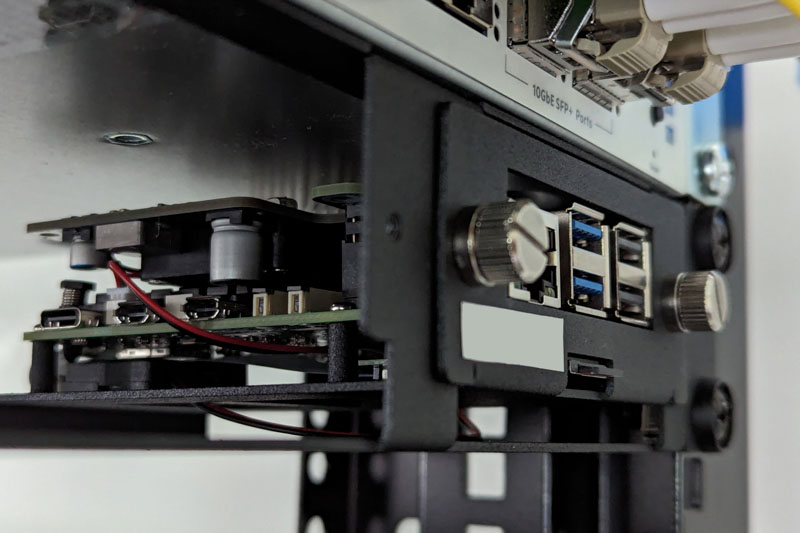
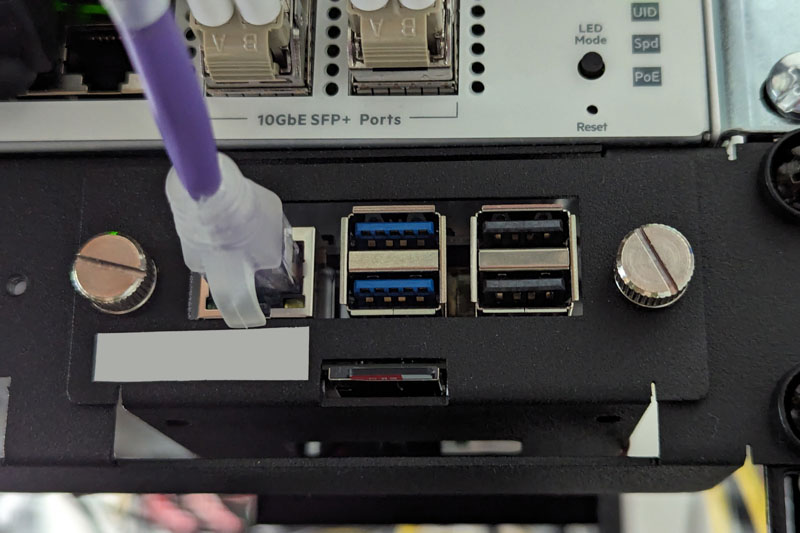
The front view below shows an Ethernet cable plugged in to supply power and connectivity. Note the microSD card is accessible right from the front. Also note the unused slot for the 2.5″ drive underneath.
Impressions
Waveshare PoE HAT (F)
Waveshare were the first to produce a PoE HAT for the Pi 5 and at the time I was building, this was the best option available. The HAT comes as a package that includes the PoE functionality, of course, but also includes active cooling for the Pi. Cooling consists of a HAT-mounted fan that blows down and a heat sink and thermal pads as described in the assembly steps above. The kit lacks instructions, so what ought to have thermal pads between it and the heat sink is ambiguous. I would be surprised if the WiFi really needed cooling, but Waveshare is covering it, which is something I would not choose to do unless it needed cooling. Who knows?
A worse problem is the cooling consistency. Under similar stress loads, the five Pi 5s I installed saw temperatures2 between the mid-60s to 84.5 degrees. Temperatures exceeding 80 degrees cause processor throttling to control heat. Why the cooling among the five modules differred so much is unclear. The position in the rack does not correlate with the temperature. The same heat sink assembly method was used in all cases.

My use cases will not produce loads high enough to cause throttling, but such inconsistency in cooling between units bothers me.
On top of the variability in cooling performance, the overall assembly with the PoE HAT installed is physically high. The height is exacerbated by the couple of millimeters Waveshare’s GPIO pins exceed those on the Pi itself. This makes the rack-mounted assembly too high to fit with adequate clearance in 1U. With an insulated cover the pins don’t cause problems, but the assembly will touch the device above.
The power supply itself is excellent. I tested this HAT with an SSD and even a 2.5″ HDD attached to the Pi USB 3.0 port. Both drives ran without errors for hours. Booting from USB devices is also possible.
Perhaps when the Raspberry Pi Foundation releases their PoE solution, which may be compatible with the official active cooler, a smaller and cooler package may be possible. For now, even with its quirks, the Waveshare PoE HAT is more than adequate.
UCTRONICS Rackmount
The design of rackmount is excellent for the price. The parts are well made, the finish is good, and the parts fit like they should. The kit came with a complete set of fasteners to attach the plate to the 19″ rack, to mount the SBCs (and potentially drives) into the modules, and the captive screws can be tightened with no tools.
Notably, its design is not liable for the clearance problems I described above. Without the HAT or with a lower GPIO interface, a module would work with no interference.
For Raspberry Pi applications that do not need other interfaces exposed, the U6264 rackmount is an excellent low cost solution. There are other UCTRONICS 1U rackmounts that support only four devices but have holes for Keystone connectors that can provide front access to additional interfaces.